In part I, I detailed how I acquired the starting materials and first steps in :
- Create a compact and tough root ball of feeder roots
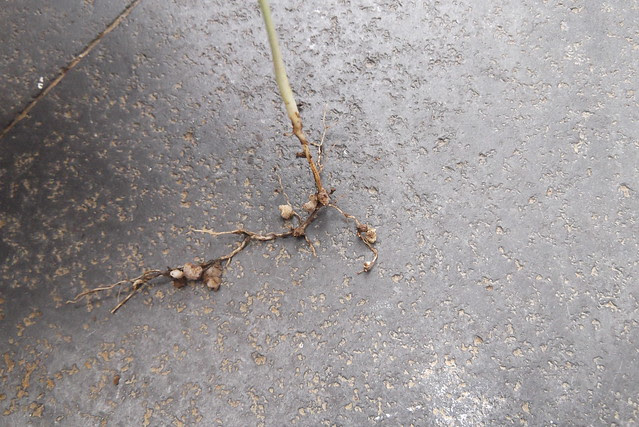
- Develop a nebari [ Surface roots that will give the illusion of an old tree anchored in the pot ]
- Toughen the main trunk
What was left was to start on the following points:
- Create primary and secondary structures
- Create ramification [ i.e. ramification is the divergence of the stem and limbs of a plant into smaller ones, i.e. trunk into branches, branches into increasingly smaller branches, etc. - this step will also encourage the formation of smaller leaves as well as define helps recreate the form and ultimately give the illusion of a full-size tree ]
- Optionally : Give some shape to the trunk and branches, ex. via wiring.
Shaping and selecting a new leader
Finally time to train the lower left branch.
The right side has sufficient character for me, over time the aerial roots should add more character to that section of the tree.
But the left side lacks character. If I leave it as it is I might get something interesting but I could also end up with a simple straight branch.

I decided to went ahead and wire the branch and simply give it a twist.
Now for the right side : It is time to choose a new leader.

Identifying the new leader and removing the old leader.


Final state of the tree at the end of this session.
Now just leave the plant alone and allow it to grow freely.
Don't forget to feed it regularly.

Getting rid of invasive weeds
The regular feeding has given good results.
Lots of growth, but its not yet time to work on the tree itself.
On the other hand, the extensive feeding has also helped the weeds to grow.

Some weeds have shallow roots structures that won't compete with the tree to get resources in the pot.
Other weeds will develop huge extensive root systems that will over take the pot and end up reducing the bonsai's effective intake of water and nutrients.
Those weeds need to be removed as early as possible if they will compete for nutrition in the pot.

You have to know your weeds and decide if its worth keeping or not.
If in doubt, or you don't know how the weed's root develops over time, just take the weed out in this case.
Better be safe than sorry :)

Starting on the creation of the primary branches at the right time
I've basically established my trunk structure now.
I could let it grow more and bulk up some more, but this bulking up will also occur when I'll start on the creation of my primary and secondary branch structures.
The plant is going into a new growth cycle.
Old leaves are turning yellow and will eventually fall off. Buds will start to swell soon and those will in turn become new branches for this new growth cycle.

At this stage its the ideal time to force the tree to pull new growth.
So I decided to go ahead at this stage and start developing the primary branches.
Removing the sacrificial branch
A sacrificial branch is a branch that is allow to grow freely in order to bulk up the immediate area where that sacrificial branch is located.
Below I'm pointing at my sacrificial branch.

As that sacrificial branch grew over the months, it also thicken the area below it.
Below : The indicated branch has thicken up significantly.

At this stage the sacrificial branch has served its purpose and can be removed.
Be careful with the angle at which you cut off the branch.
This branch become a primary branch.

Below : Another potential sacrificial branch.
I could leave it to bulk up that small "trunk", but in this case I will remove it.
The process of developing the primary branches on this "trunk" will over time bulk it up naturally.

Below : Final shape of the tree.
The basic trunk structure is established, now I need to start creating and developing the primary, secondary, tertiary structures etc.

Follow up on the wiring
Don't forget to regularly check on the wires.
As the tree grows, the bark will start to grow into the wire, which in turn will leave a scar.
How long you can wait, or to what extend you can let the bark grow into the wire is entirely up to the tree's ability to recuperate after you've removed the wire.
Big scars = longer time for the tree to seal it off.
Smaller scars = shorter time for the tree to seal it off.
Below : The trunk is just starting to grow over the wire.
In a bigger tree I could leave it for another month or so.
But since I'm planning on making a shohin bonsai [ bonsai less than ~20 cm in height ] or even a mame bonsai [ bonsai less than ~13 cm in height ], I prefer not to allow the bark to grow too much onto the wire.

Below : After the wire was removed.
You can see the scar left by the wire.

Reducing foliage, encouraging new growth
This step is optional, but if do try it make sure that :
1. The tree is healthy - I.e. did not suffer an major pest attack or fungal attack in the weeks or months prior.
2. The tree is has enough food reserves to pull new growth - In this case I've been feeding the tree for months before hand so that it has enough resources to create the new branch structures I will try to stimulate it to grow.
3. The tree is being defoliate at the right time. Very important! The tree may be healthy and have enough food reserves, but if you are defoliating at a time where it should be sleeping, you will needlessly stress the tree.
4. The tree rests and recuperates from the defoliation afterwards. Defoliation is a stressful process for the tree, it is using up its reserves to build new structures. You need to allow it to rest and build up once more its reserves before attempting any other stressful action in the future.

In this case I will not fully defoliate the plant, but instead reduce the leaves, but the warning above still prevails.

To reduce the leaves, just cut the leaf in half.
Ideally try to do it artistically to make it look like a leaf (kite shape)


After a few days new shoots appeared all over the trunk and branches.


Bonsai design - Creating a virtual
Sometimes it’s hard to get a good idea of how to shape a bonsai material that was started from scratch.
The initial starting material [ see part I ] looked messy with poor potential, with almost no foliage, the few foliage present only growing on the ends of long branches.
Now the tree has evolved enough for me to see a potential image of a tree in my mind.
That image might evolve together with the tree as new features appears.
But its always a good idea to have a visual image of what you want your plant to look like in the future.
It helps you direct your actions on the tree and not waste time on unnecessary actions.
It helps you to identify areas that needs more growth or areas that should be more controlled.
At any point in the future it is easy to grab your tools, to start wiring and prune away, but to make sure you make the right decisions sometimes the best thing is to make a sketch or virtual first.
Below : Not the best virtual in the world, but enough to give me a general idea on how to nudge the plant in the right direction for the next 2 ~ 3 years.

Ficus rubiginosa #2 - Part I