Labels

90th Kokufu-ten Exhibition (1) ABC (4) ABC4 (1) Akira Bonsai (2) ambrevatte (1) Apple (1) AusBonsai (1) Bilimbi (1) Bilimbi Rond (1) Bjorn Bjorholm (1) Bjorvala Bonsai Studio (1) Bonsai (67) bonsai artists (5) Bonsai Club Mauritius (5) bonsai competition (1) bonsai competition 2013 (3) Bonsai Europa (1) Bonsai Events (2) bonsai experiment (1) Bonsai From Seed (8) Bonsai Lovers (2) Bonsai Mauritius (60) Bonsai Mauritius for Sale (6) Bonsai nursery Mauritius (4) Bonsai progression (18) Bonsai Videos (1) Breynia (1) Carving (1) casuarina 001 (1) cherry (2) Clerodendrum (2) Clerodendrum Bonsai (2) Clerodendrum Smithianum Bonsai (2) Clerodendrum Smithianum Bonsai 001 (2) Cryptomeria 001 (1) Cryptomeria japonica (1) cuphea (5) cuphea 001 (2) cuttings (1) deadwood (1) DIY (1) Eagle Entrepreneur Award (1) false bonsai mauritius (1) fern (1) ficus (7) Ficus 002 (1) Ficus 003 (2) Ficus benjamina (2) Ficus bonsai (5) ficus retusa (1) ficus retusa bonsai (1) ficus rubiginosa (2) ficus rubiginosa #2 (2) François Jeker (1) Hem Collection (3) Jan Culek (2) John Naka (1) juniper (3) Kaori Yamada (1) kusamono (3) lantana (1) Laurent Breysse (1) Leucaena Leucocephala (3) Light Bulb Clerodendrum (2) Ligustrum (8) lime sulphur (2) Malpighia coccigera (4) Mauritius (15) moss (1) Nebari (4) Noelanders Trophy (1) ofBonsai (1) pine (1) Pinus Elliottii (1) Privet (4) Privet 001 (1) Privet 002 (1) Privet 003 (1) privet 011 (1) Repotting (8) rose (1) Ryan Neil (1) Ryuga (1) saika bonsai (1) Sakura (1) seed (6) Sergio Martínez (1) Shohin (1) Slash Pine (3) Slash Pine 001 (1) Slash Pine bonsai (2) Slash Pine Hem 002 (1) Smithianum (2) Species Guide (1) Styling (1) Tomio Yamada (1) Tony Tickle (2) Trochetia (1) Trochetia Boutoniana (1) Vaneron Garden Center (2) Walter Pall (3) white pine (1) Wiring (5) World Shohin Photo Awards (1) Yajay Goindo (1) Yamadori (2)

2014-06-26

Winter 2014 - Repotting session part I

Winter is definitely here and some trees are going dormant while others are starting a new growth cycle.
It's pretty easy to see whose doing what : trees with leaves that have fallen are the trees that are going dormant, while the trees that are showing signs of new buds, bud swelling or bud developping into leaves are starting a new growth cycle instead of doing dormant.

I took that opportunity to do some repotting on various trees.

Trying out a new potting mix

My usual potting mix is a mixture of grid/pebbles, perlite and pine bark.
But lately there have been several new interesting horticulture materials on the local market and I decided to go and give those a try.

I did use the soil-less mix before for potting and training and got some good results.
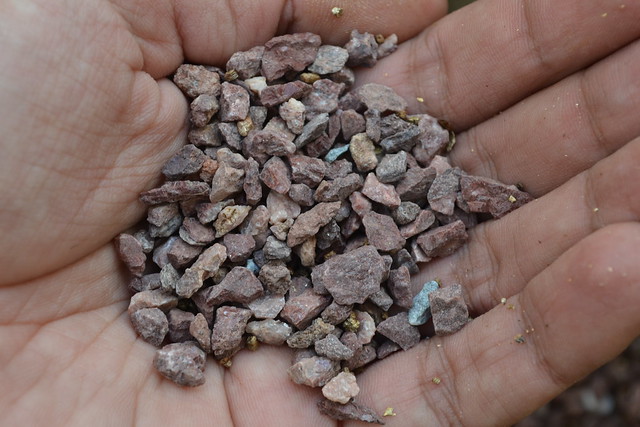
I still retained my inorganic medium, 5~6mm pebbles from Espace Jardin.
DSC_0638

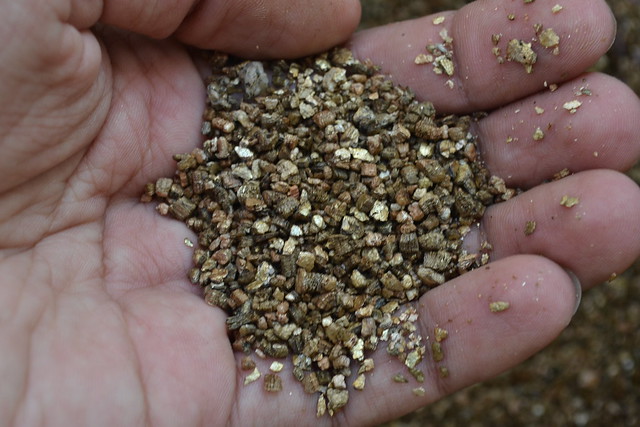
For water retention I used to use perlite, but I found some vermiculite at Vaneron Garden Center, and decided to give it a go.
DSC_0637

And instead of pine barks for my organic component, I decided to give the new soiless mix that's available in several nurseries and plant centers a try.
DSC_0636
DSC_0642

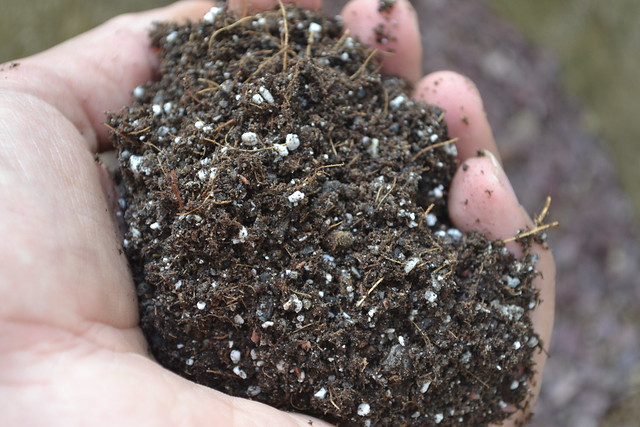
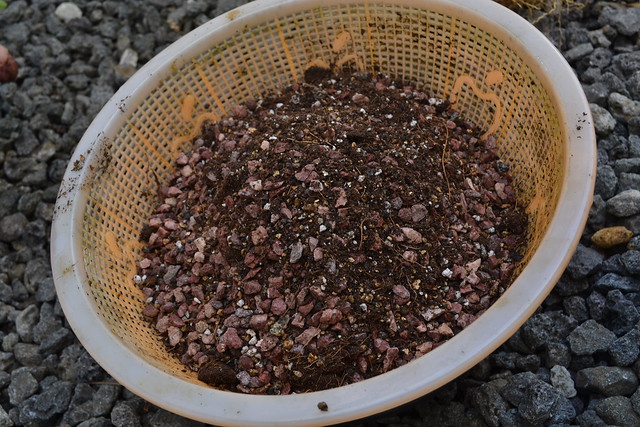
And here's the mix with all three components combined
DSC_0662

For more info on bonsai soil here are some links:
Bonsai Soil Demystified
Soil basics


Repotting #1

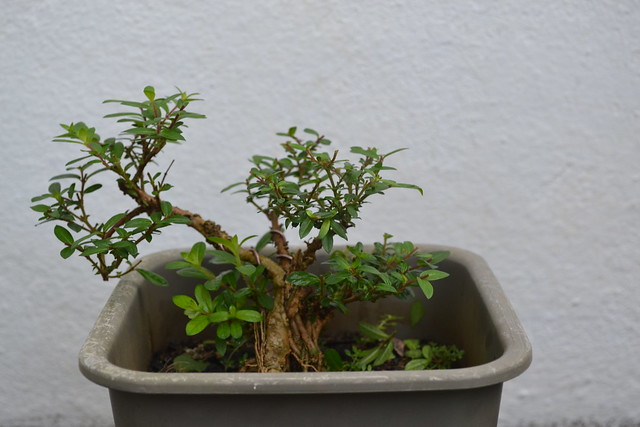
My first repotting priority was this ligustrum ( privet / troène ) that I had to repot in a classical potting soil some time ago. Time to go towards a much more draining mix now.

DSC_0650
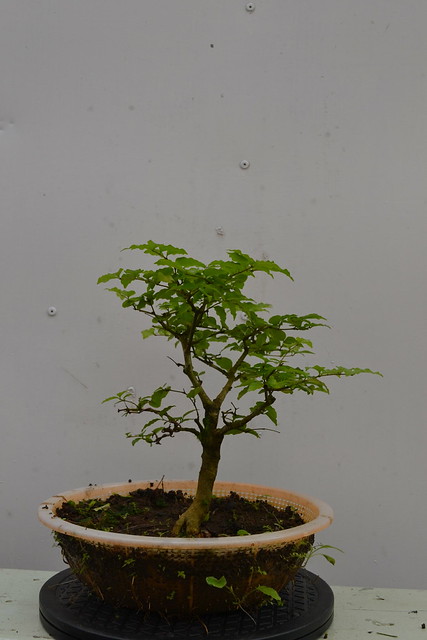
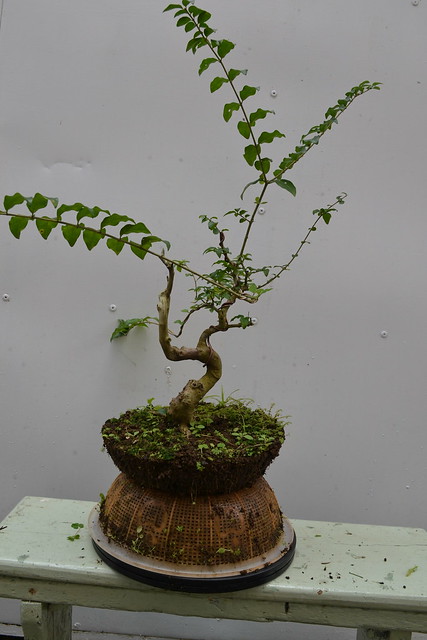
Ligustrum in the training "pot".  Colanders in a bonsai training method in use for some time now.
Read more here : In praise of colanders
DSC_0651
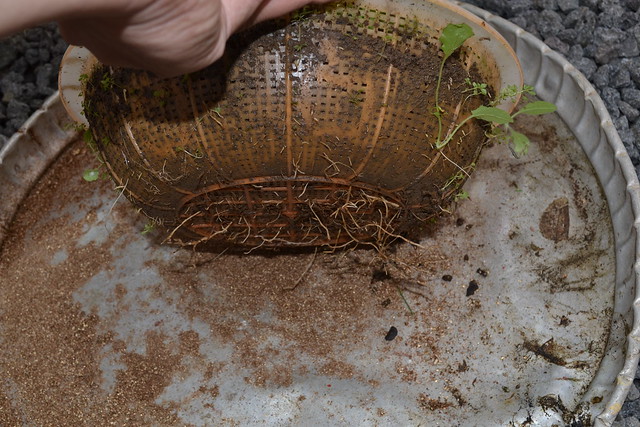
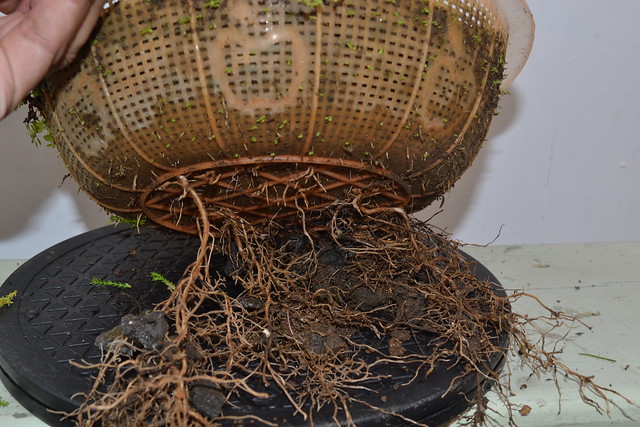
The purpose of the colanders is to promote finer roots. In a normal pot with only drainage holes
at the bottom, the tree tends to develop lateral roots that curl about in the pot. With the colanders the aim is to promote :
1. Finer roots ( feeder roots )
2. Enable the roots to spread ( and even leave the colander )
instead of coiling around in the pot.
DSC_0652
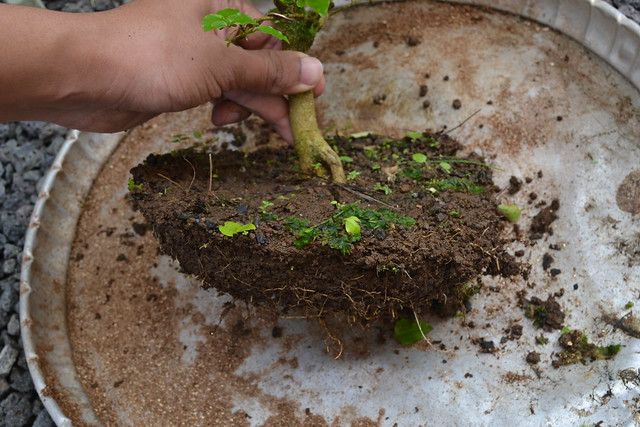
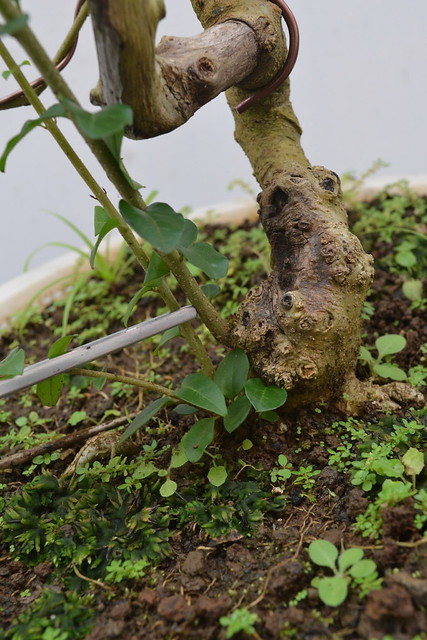
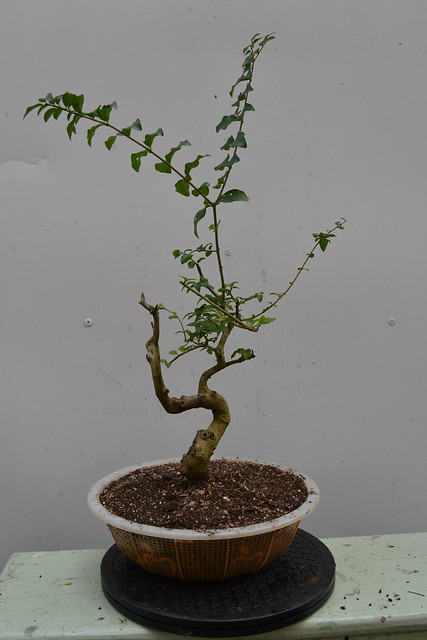
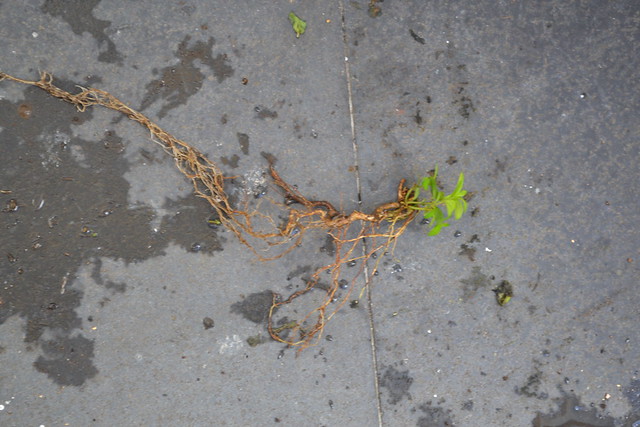
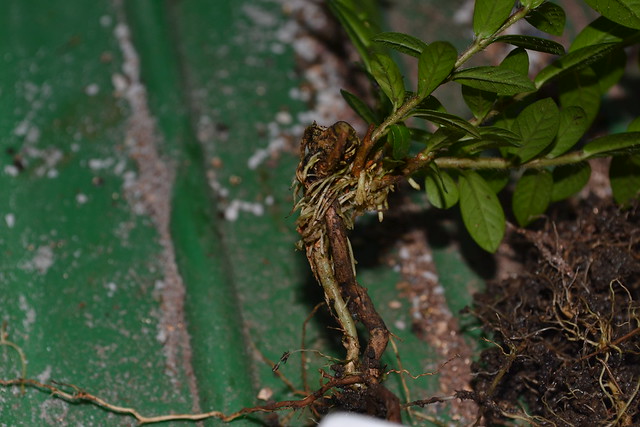
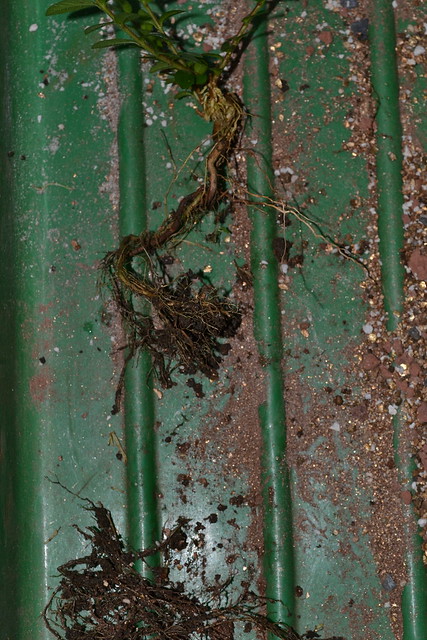
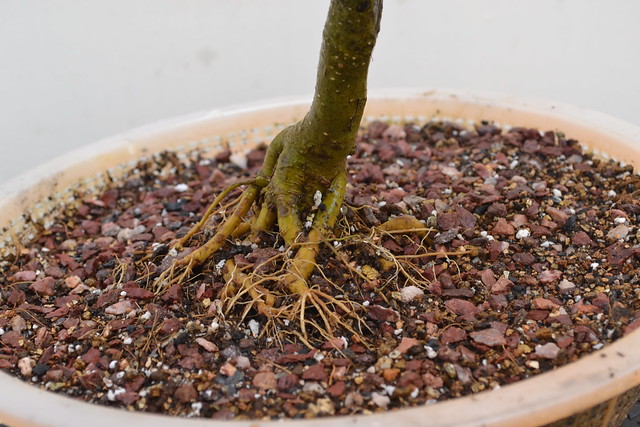
One of the rare trees that I had in full gardening soil, time for some draining mix. Notice the soil level here, the nebari is still underneath the soil surface.
DSC_0654
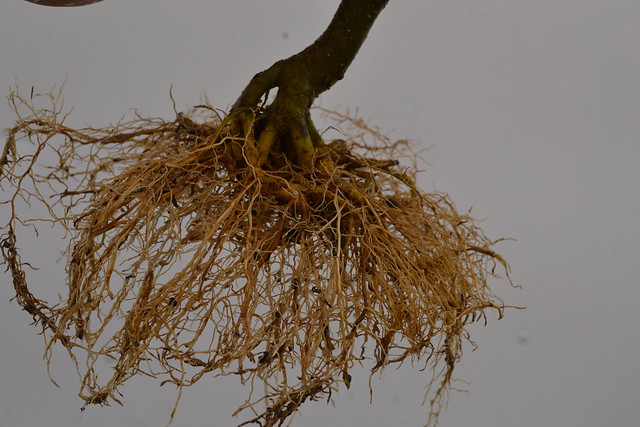
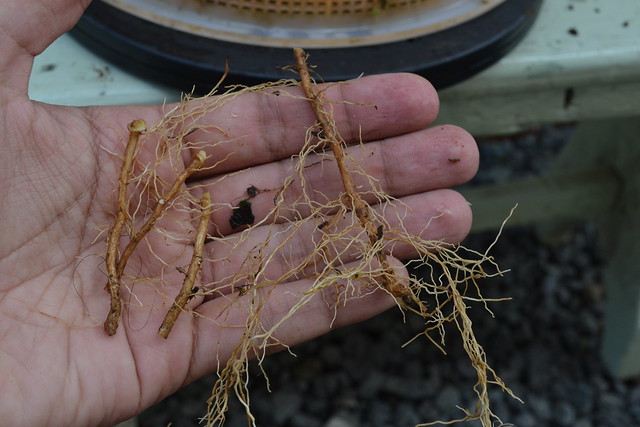
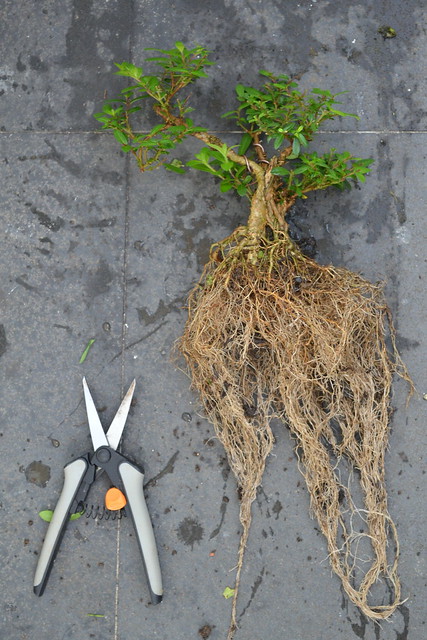
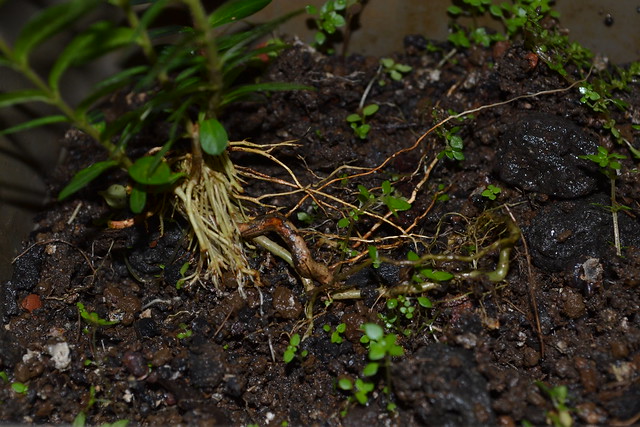
Now that's what I'm looking for! Lots of feeder roots and fine roots. I did not perform any root pruning on this tree for this repotting session.
DSC_0659
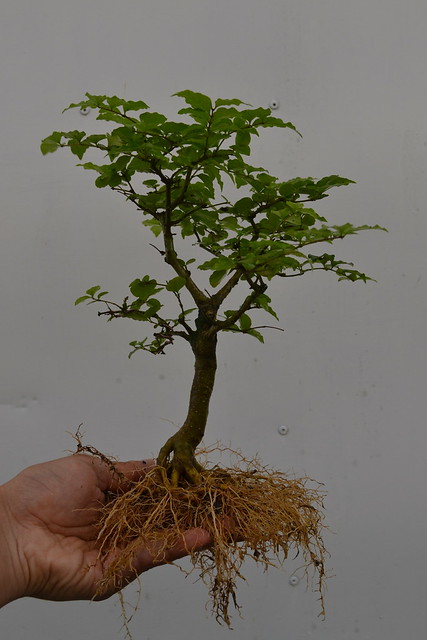
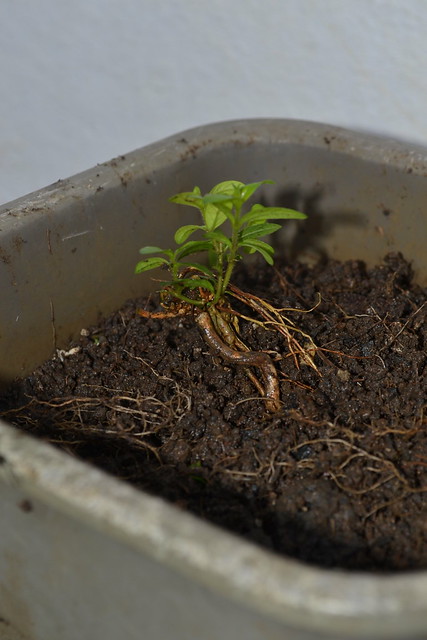
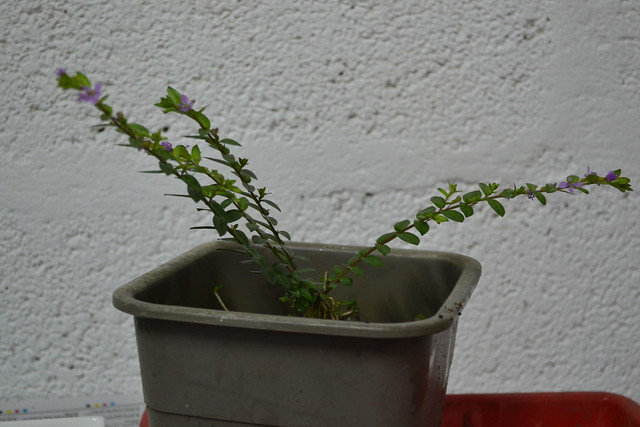
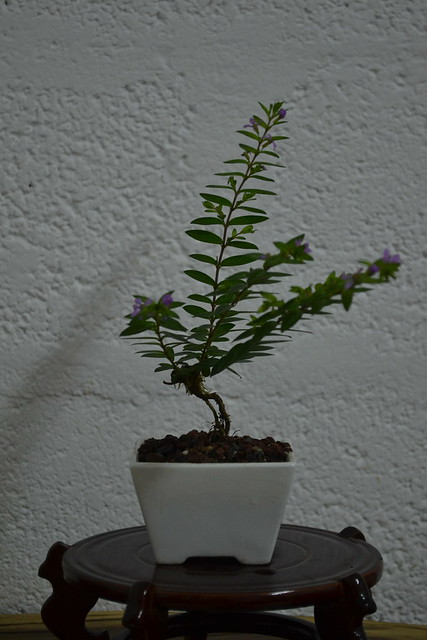
Here's the little guy :)
DSC_0669
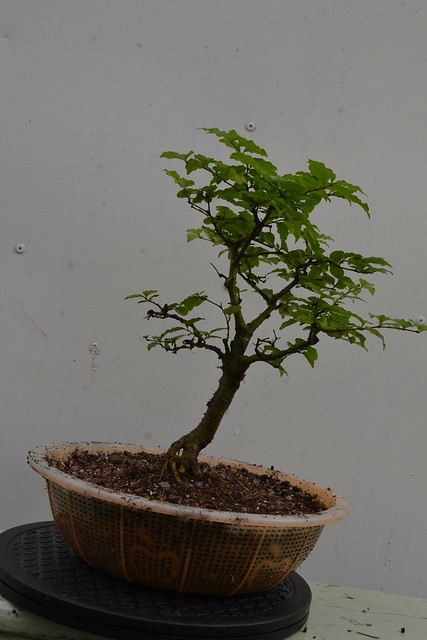
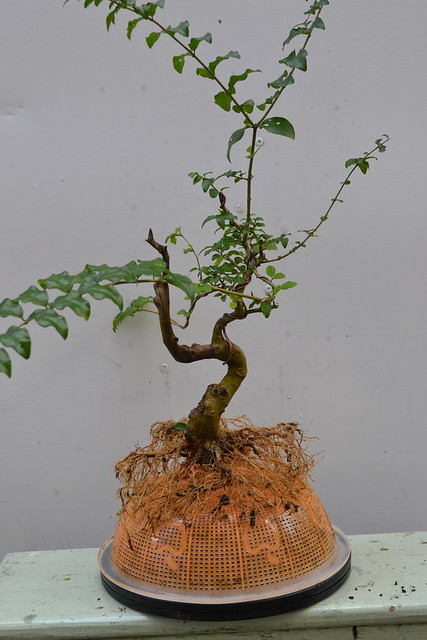
Repotted ( sorry for the slanted shot angle I noticed it afterwards )
DSC_0670
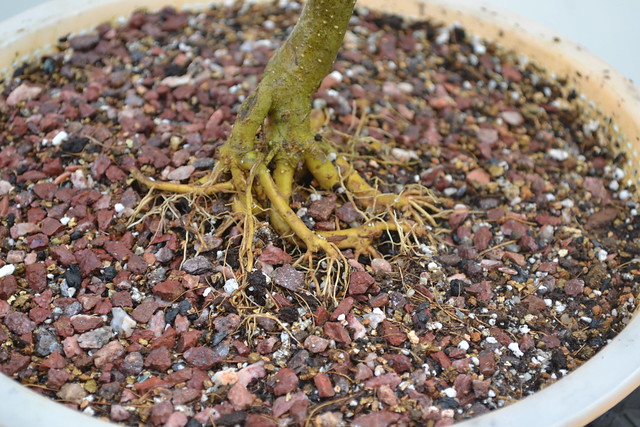
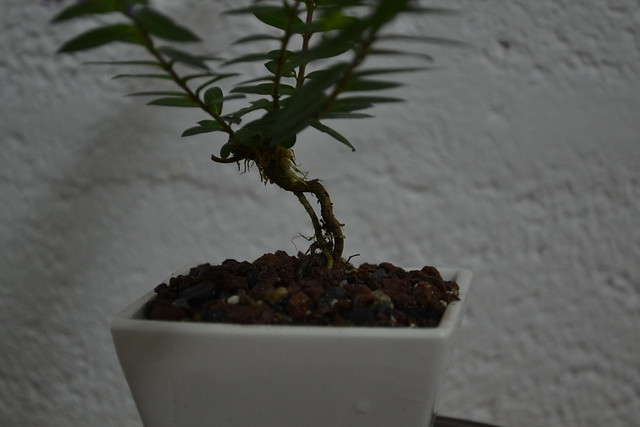
I repotted the tree with the nebari exposed.
DSC_0671
Another angle

Wiring #1

This thuja seedling's trunk is starting to lignify ( starting to produce woody structures ), its about time to wire it and give it a rudimentary shape before it lignifies too much and becomes too hard to bend.

DSC_0673
DSC_0676
DSC_0678
DSC_0679
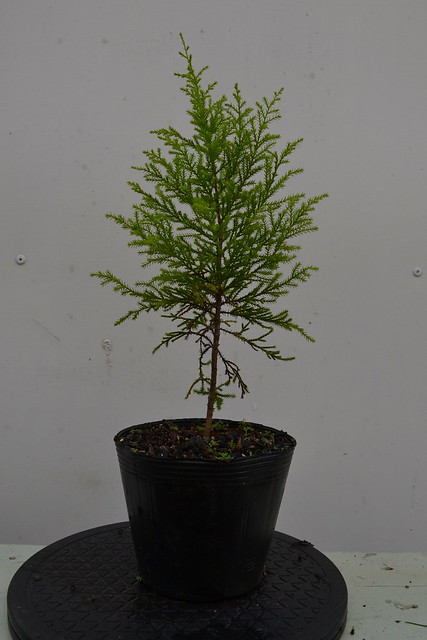
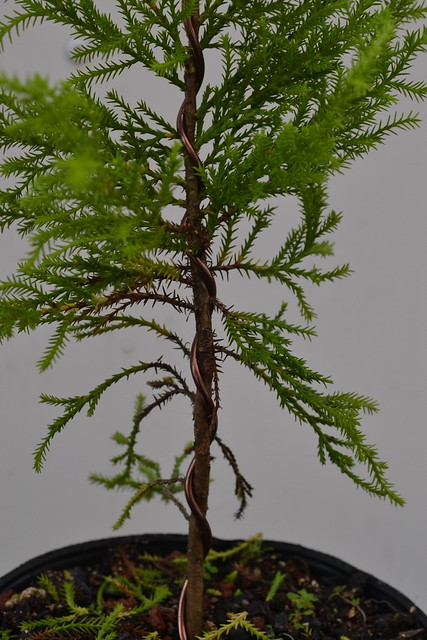
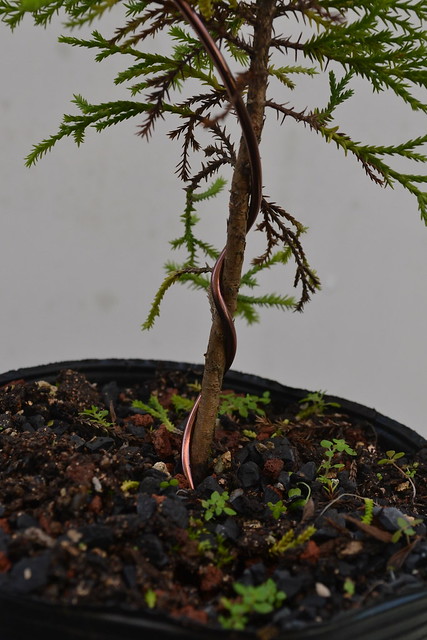
Take care not to crush the branches.
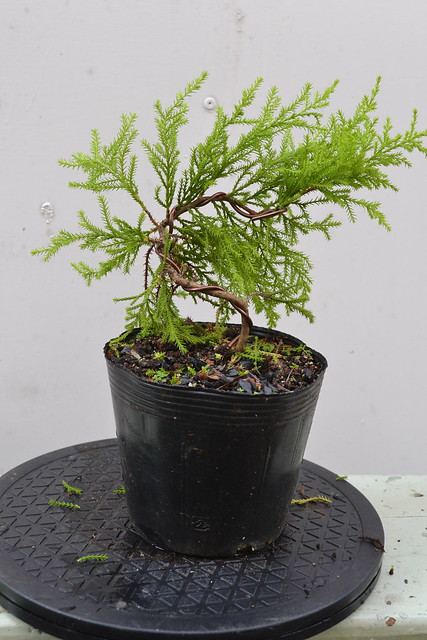
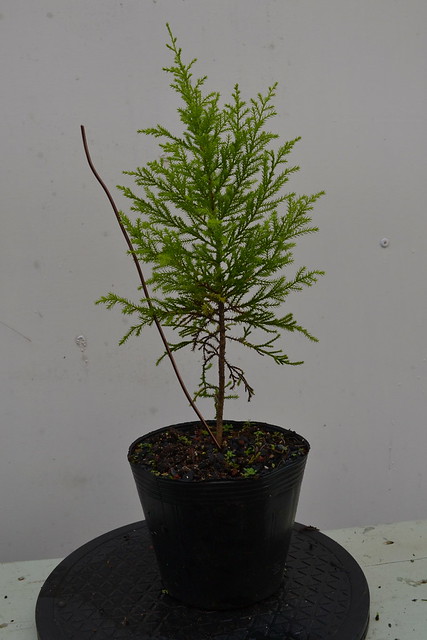
DSC_0681
Wired and shaped

Repotting #2

This ligustrum is in the stages of branch development. Not a pretty sight and definitely not show ready. There are several sacrificial branches that are still on the tree and which will still be on the tree for quite some time.

DSC_0684
DSC_0683
DSC_0686
DSC_0692
DSC_0695
DSC_0696
DSC_0697

2014-06-22

Cuphea literati

I often find interesting stuffs when working on my plants, be it a normal plant or a (pre)bonsai.
Sometimes the projects works, other times they don't work.
My best example would be my mame root bonsai : http://maubonsai.blogspot.com/2013/03/ligustrum-011-mame-progression-from-root.html
It was just a root cutting that I kept because it had an interesting look to it, and now its one good track to become a nice mame.

My new project is a cuphea mini root that I salvaged during a repotting session.
It was from the cuphea entered in the last OfBonsai Ryuga contest : http://ofbonsai.org/contest/ryuga-2013/entry-cuphea-hyssopifolia-false-heather-mauritius

At first I was not having much expectation for this plant, but now its starting to get more and more appeal to my eyes. I have various ideas for the foliage disposition, but what I know for sure is that I want to try and create a " bunjin (literati) shohin cuphea".

Lets translate that last bit :
Bunjin / Literati = Its a "bonsai style" difficult to define precisely, this style breaks many rules but nevertheless the trees have an air of refined elegance. The slender trees in japanese paintings (sumi-e) had an abstract, calligraphic quality that was the inspiration behind cultivating bonsai in this style.

"Pine Trees" (left hand screen) by Hasegawa Tōhaku (Japanese, 1539–1610).
The painting has been designated as National Treasure in the paintings category.
Bunjin Bonsai / Literati Bonsai


Shohin = Shohin-bonsai are 20 cm / 8 inches and under. Basically small sized bonsai ( yes there are BIG sized bonsai, some over 3m high! )

Cuphea = Is the name of the plant. In this case a Cuphea hyssopifolia.


DSC_0385
The parent tree
DSC_0397
During the repotting session I decided to remove the foliage on the bottom left close to the trunk.
DSC_0420
Turns out to have its own root system
DSC_0422
I did an initial repotting. I placed it rather deep into a pot, leaving only a small section out to maximize rooting chances.
DSC_0361
After some free growing the tree seems to have well rooted and gain back its vigor
DSC_0369
Close-up on the formation of aerial roots
DSC_0371
Repotting - you can see how the root system has toughen since the first repotting
DSC_0373
Removing the aerial roots.
This section will be the new apex of the future bonsai, this means that I don't need the aerial roots.
I'm trying to create a bunjin here, this means feminine trunk line, not a bulky masculine trunk line.
DSC_0374
Cleaned up trunk. There are still some roots, but those can be removed later on.
DSC_0377
Now for the main roots.
DSC_0378
Reduced root ball
DSC_0381
Repotted
DSC_0384
Close-up of the trunk line
DSC_0383
Flower detail


2014-06-21

British Shohin Association Exhibition 2014 Part 1 - Peter Warren Exhibit Critique


A walk around a few of the exhibits with Peter Warren at the BSA 2014 Exhibition at Willowbog Bonsai Nursery.


Big thanks to Bonsai Eejit (Ian) for sharing those events on his YouTube channel!

2014-06-15

Bonsai Club - First informal meeting part 2

Last weekend we had our first informal bonsai meeting at Hem's place.
It was not something that was planned, I was just going there for a quick "Hello" and ended up with a 6 hr informal bonsai meeting, where we worked mainly on Jeanluc's plants.

Well this meeting was unplanned and we did not took any pictures methodologically but mostly randomly.


Yamadori Goyava : Carving

I think the most interesting material for me was this yamadori goyava belonging to Jeanluc Essoo.
Here's a little evolution of the tree since it was collected, courtesy of owner ( Jeanluc ).


Originally that material was not meant to be worked, but a section of deadwood caught my eye and I decided to work on it.
I think it has a huge potential to become an outstanding goyava shohin if Jeanluc managed to nudge it in the right direction over the coming years.

Old front - I think the left side should be the new front in the long run.
The section of deadwood that caught my eye. The old cambium was still on the
tree and it was keeping moisture trapped underneath which in turn will cause the wood to rot faster.
Another issue arising here, the two dead branch touching, one needs to go or get reduced.
Decided to keep the lower branch but to reduce its diameter. 
We did not do a full work on it - time was short.
It definitely needs 1 or 2 other sessions done on it.

Trying out some Lime Sulphur

We used the newly created deadwood to test some lime sulphur (or lime sulfur ) and see how it reacted.
This was purely for experimentation.
For info that dead branch was already dry and lifeless, on a fresh green carved branch I usually prefer to let it get weathered down first ( even if its not strictly necessary ). 


Ended the session on a quick "How to unwire" course :)

There were some wires on the upper branches. The tree was starting to grow into those wires, and it was more than time to remove them. We ended the session by going through the basic notions on removing wires on the branches : when and how to safely unwire by hand, how to cut wires instead of removing by hand and where to cut wires partially.
Hem and Jeanluc in the process of identifying areas to unwire

Jeanluc cutting the wires

Jeanluc cutting the wires